How do prototypes complement analyses? Part 1
We talked to Trinidad Wiseman’s service design team leads about prototyping. We asked them how to save on a project’s costs by prototyping and how prototypes can help both the analyst as well as the whole project team in their work.
What is a user interface prototype and why should you use it in your analysis projects?
A prototype is a model or a draft of the system’s user interface, made by the designer or analyst to create and convey a common vision, to inspire discussions, to test various activities and versions, and to gather feedback.
Prototypes can be validated with end users, which means that the logic of the solutions can be tested and any areas or situations that create doubt in users can be identified.
In other words, prototyping is a very important part of the process of creating a software solution. It can be used to gather feedback about the future system during the early stages of its development which, in turn, can help us get closer to the desired vision much more quickly.
”The purpose of a prototype is to change as much as possible, as cheaply as possible – it is infinitely cheaper than making changes to the user interface of a fully developed system."
This means that in the case of a prototype, we will often only have to move around boxes and text, but a lot more effort is required to make changes to a developed information system.
If changes need to be made to a fully developed system, then the work may involve more than just writing new code – the architectural solutions and databases may also need to be changed, which is significantly more expensive than making changes to a prototype.
After all possible tests have been conducted and the prototype has been changed enough to make all parties happy with the final version, the development can get started.
In addition to creating a common vision and making feedback easier to manage within the project team, prototypes also play an important role in the cooperation between the analyst and the development team.
A prototype will enable to explain and put together development tasks in a quicker and easier manner for the developers by conveying the information visually instead of having to use words.
Additionally, using a prototype greatly increases the probability of the whole project being a success and keeps the team motivated as no one has to redo anything due to someone’s words or vision being interpreted incorrectly. All unsuitable options can easily be removed from a prototype.
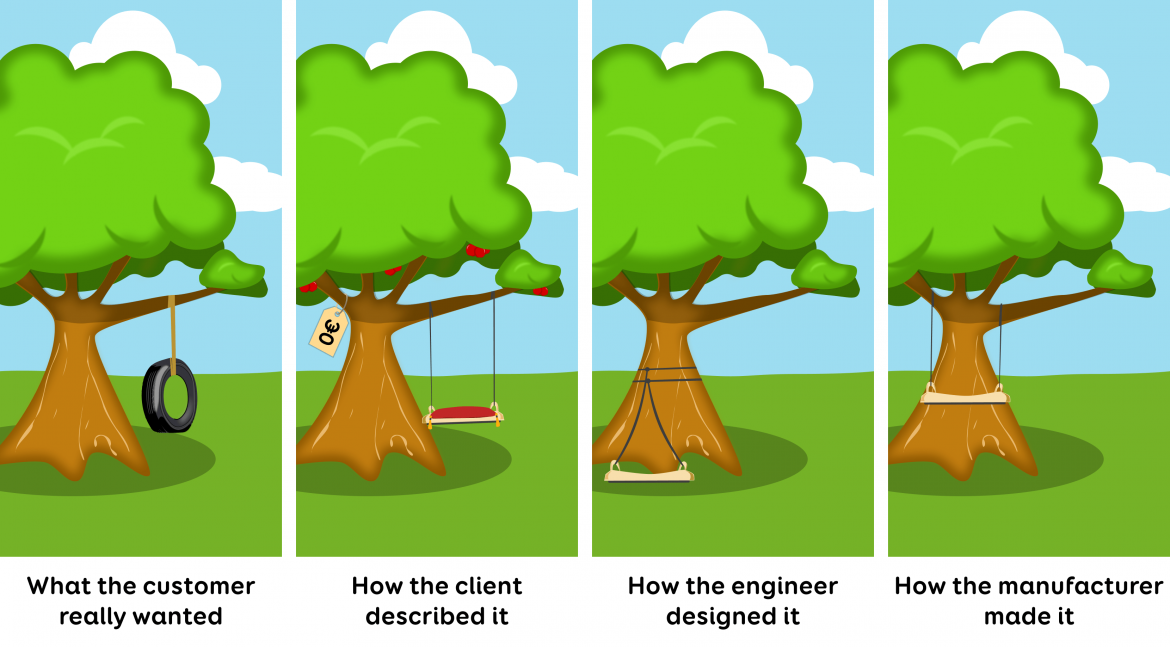
Read our earlier posts About your new prototype. The following illustration is a great example of what may happen in any project where prototyping is not used: the client will describe their wishes, wait until the solution has been developed… and it will turn out not to meet the client’s expectations.
What can happen if no prototyping is done. Our version of the tree swing illustration.
How does the end user benefit from prototyping?
In all of our projects, we first present multiple iterations to the work group, the analyst, and the client to gather input for the developer.
Finally, we always validate our prototypes at Trinidad Wiseman with end users to identify whether we have understood the customers’ needs correctly and designed the system in a way that is clear and understandable to them. We will fix any areas that are not working properly and test them again to ensure that the problem was fixed.
By doing this, we can avoid conducting tests on a published system with end users in situations where having access to a service may be of critical importance to them and any errors and failures would only create discontent.
All of this helps us ensure that by the time the system is launched, end users actually understand how to use the new system.
What kind of prototypes do we use in Trinidad Wiseman’s projects?
Dependent on the needs of the project and its current phase and budget, it is possible to create prototypes of varying levels of detail (fidelity). A prototype can be a draft sketched on paper with pencil, a static view, or a design made with corresponding software, which already looks like the actual system and includes interactions and working filters.
Multiple different programs can be used to create prototypes (e.g. Axure, Figma, Sketch) and it can all definitely be done without having to write a single line of code. In other words, no actual development is done during this stage.
Depending on the project and the prototype’s level of detail, the interaction designer or UX designer may need anywhere between a few hours to a couple of weeks to create a prototype.
Next, we will take a closer look at the kinds of low- and high-fidelity prototypes we use in Trinidad Wiseman’s projects – we will also explain their advantages and disadvantages.
Low-fidelity prototypes:
Paper prototype
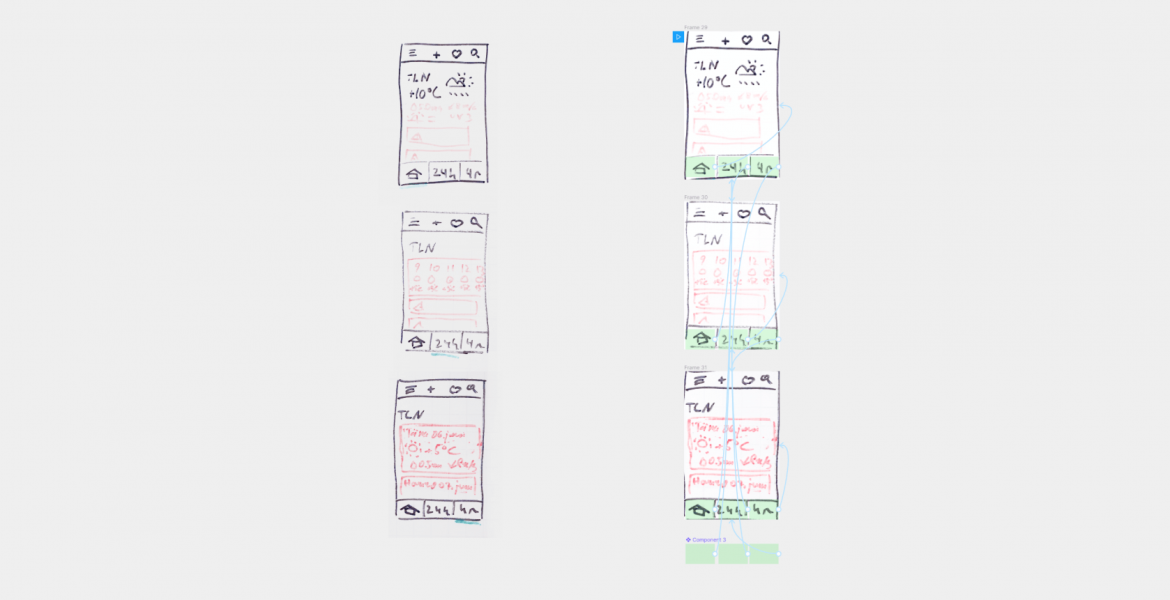
The lowest fidelity prototype is usually made using paper and pencil or by drawing it on a wall. This kind of prototype is good for making general decisions about what the user should be able to do in the system. The prototype is completely static.
Example of a low-fidelity prototype drawn on a wall.
Black and white wireframe
A black and white wireframe brings interactivity to the prototype. It is drawn using specialised software and the prototype can be viewed on the device that the final solution will be used on, e.g. a laptop or a smartphone.
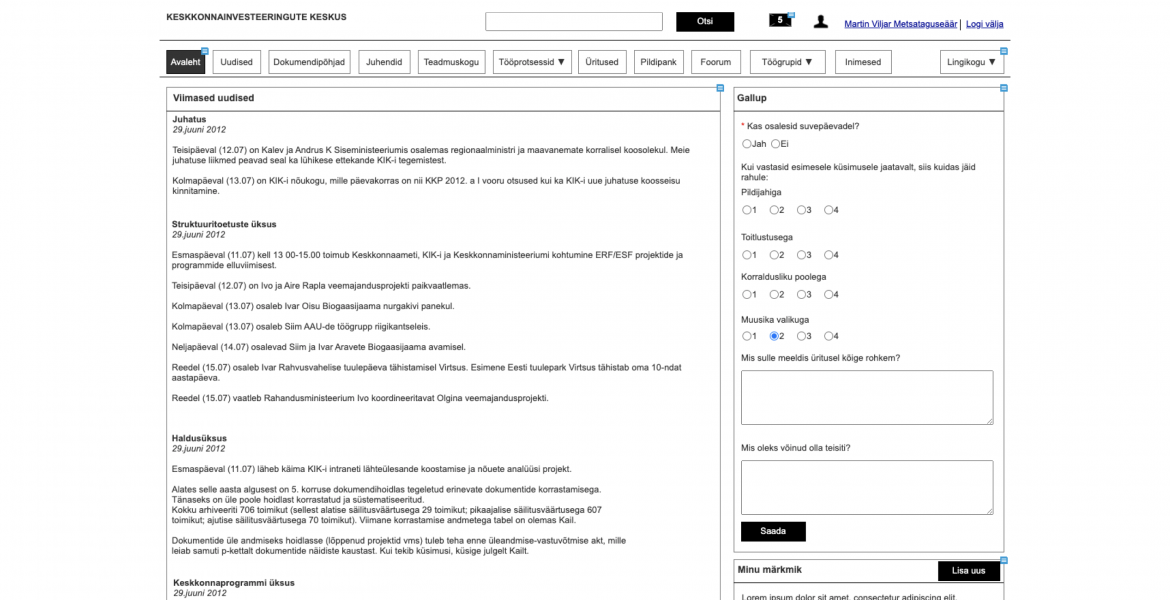
Here, the goal is still to play through the information architecture of the future system AKA where the elements will be placed and its functionality AKA what can be done in this environment. Compared to a drawn prototype, we can see more realistic content in a wireframe (the names of buttons, titles, category names).
Questions such as if, how and where certain elements can be placed considering the realistic measurements of the screen are dealt with during this stage. Visual details, fancy fonts, and colours are not yet worked on.
Example of a black and white wireframe prototype.
Black and white prototype + style guide
We have a lot of examples from our experience at Trinidad Wiseman of projects that are completed with only a black and white prototype – even in cases where the prototype is created by designers, not analysts.
How does that work? In the prototype, the buttons are black and white, and it is accompanied by a style guide that can be referenced for information about the solutions’ colours, fonts, and other details.
To get to the desired outcome, the developer will merge this information together in code. This allows us to move forward with a project much more quickly and to save on costs, but it also comes with its own risks!
We only recommend using this kind of style guide + black and white prototype solution in cases where the team has been working together for a long time and its members understand each other very well. Otherwise, you run into the danger of the developer writing code for a black and white system, creating double the work for everyone.
Additionally, it is difficult to conduct acceptance testing on a black and white prototype. To avoid any problems from arising, it is important to agree on how the wireframe must be interpreted in order to reach the actual solution.
Advantages of low-fidelity prototypes:
- cheap – a clear advantage is the very low price;
- quick to make – e.g. a paper prototype can be made very quickly and easily in about 10 minutes;
- conducive to cooperation – creating these kinds of prototypes does not require any special skills, which means that more people can be involved in the design process (including non-designers);
- effective explanation tool – both the work and interest groups get the same idea of the future solution.
Disadvantages of low-fidelity prototypes:
- uncertainty during testing – e.g. test participants may not understand clearly what is supposed to be clickable and what is not. These kinds of prototypes require a lot of imagination, thus limiting the results of user testing;
- limited interactivity – this kind of prototype cannot be used to show complex animations or transitions.
High-fidelity prototypes:
In projects where the visual language has already been defined – for example, ones that have a proper style guide, which is actively being used –, it is possible to make interactive prototypes that are nearly pixel-perfect in their design.
This helps to explain to developers in a much faster and better way what is meant by one button or another, what exactly everything is supposed to look like, and where they should be located in relation to one another.
But beautifully designed prototypes can only be made once the project has reached the point where discussions about the colours of elements and fonts have been had. Once the design rules have been set, it is no longer as expensive to make a visually appealing prototype in comparison to making one right in the beginning of the project.
Advantages of high-fidelity prototypes:
- useful feedback during usability testing – users will approach these kinds of prototypes as if they would the final product, which means that during usability testing, they will behave in a much more naturally than when testing low-fidelity prototypes;
- possibility of testing specific user interface elements or interactions;
- it is easier to get clients and interest groups to agree on things – these kinds of prototypes are also very good for presenting the solution to owners and interest groups as it provides clients and potential investors with a clear overview of how the solution should work and what it should look like.
Disadvantages of high-fidelity prototypes:
- bigger costs when compared to low-fidelity prototypes – both in terms of time and money.
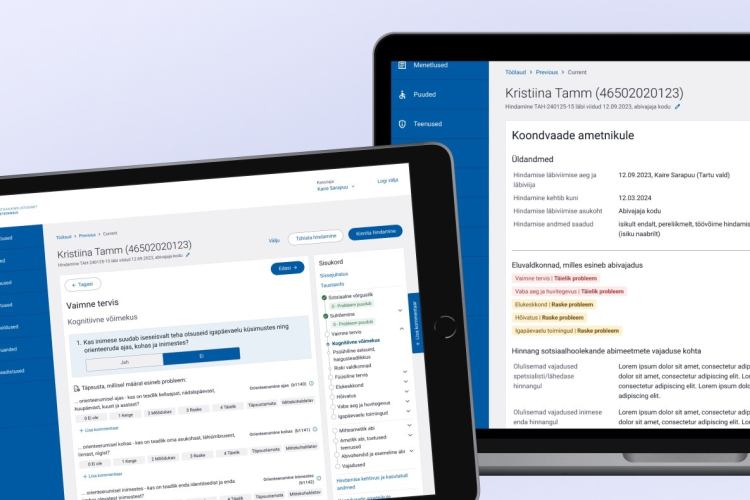
Example video of a high-fidelity prototype: prototype of the Labour Inspectorate’s self-service platform.
The prototype itself is meant to be discarded in the end, which means that it provides a lot of room to play around and try out different versions of the solution. The designer will create many iterations and the work group can then pick out their favourites from among these and discard all unsuitable options.
As mentioned above, simpler prototypes can be created very quickly and used during different stages of the project to create a visual understanding of the system.
If we only wish to get the work group’s or client’s opinion on the navigation, then we can present them a simpler black and white prototype and give them clear instructions to only evaluate the navigation, not the design.
You can read more about how prototypes are created in our earlier article Prototyping is more than just folding a paper plane.
Soon we will continue with this topic – in part 2, we will take a closer look at what the prototyping process looks like in different projects (informational website, online store, information system) and we will talk more about the cooperation between the analyst and the prototype creator.


